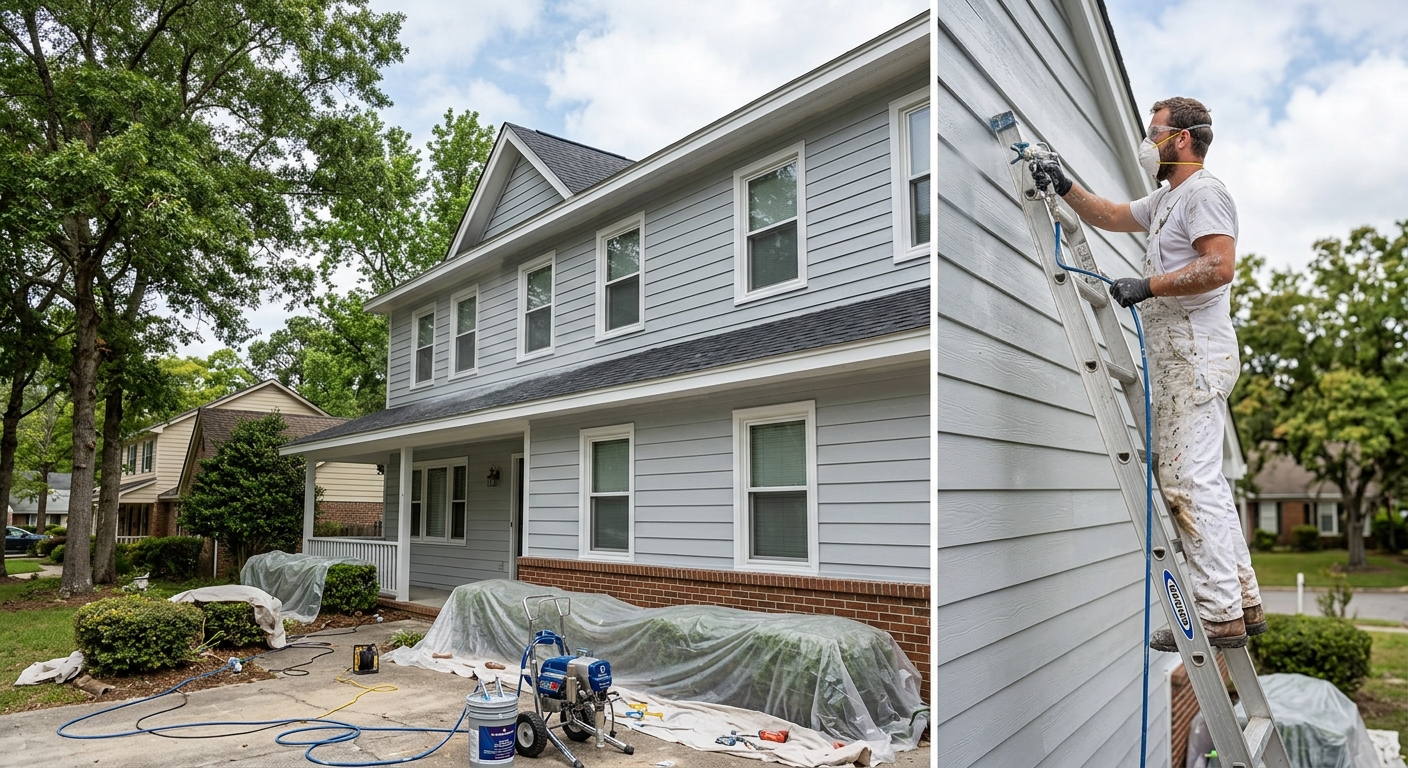
Painting options and costs in Richmond
Richmond, British Columbia is a prime market for painting, but costs can swing widely depending on how much prep your home needs. With 25.9% of local dwellings built before 1981, many houses have older coatings that fail differently—often requiring scrape-and-sand work, settlement-crack patching, and more aggressive priming to block stains and prevent “bleed-through.” In some pre-1978 homes, contractors may use lead-paint–safe practices (containment, HEPA cleanup, and proper disposal) because the risk profile changes how prep is done.
In the Lower Mainland–Southwest, the coastal weather shapes both labour demand and schedule. Exterior painting isn’t dictated by deep cold as much as it is by rain, humidity, and mildew risk. Painters typically need dry stretches to apply and cure coatings, plus products that bond strongly in damp conditions. That timing pressure is why you’ll see stronger pricing when crews are stretched during the drier windows. Interior work is steadier through fall and winter, so many homeowners shift spending indoors when outdoor schedules tighten.
Demand is especially noticeable in areas like Steveston and the broader West Richmond neighbourhood, where a lot of repaint projects are tied to aging siding, trim, and interior refreshes. The next table breaks down common project types and realistic Richmond ranges, so you can compare quotes apples-to-apples before you book a site visit.
| Service |
What's Included |
Typical Duration |
Price Range |
| Interior — whole home (walls, ceilings, trim) |
Masking, surface cleaning, caulking touch-ups, sanding/patching as needed, 2-coat topcoat system, primer where required, basic protection of floors and fixtures |
4–10 days |
$3,200 – $7,800 |
| Interior — per room (standard bedroom or living room) |
Clean, prep, fill/sand minor defects, prime stained/spotted areas as required, 2-coat coverage, cut-in to trim, light protection and cleanup |
1–3 days |
$600 – $1,600 |
| Exterior — full house (siding, trim, soffits) |
Surface scrape/sand where needed, caulking repairs, spot-priming, prime-and-paint system suited to siding, mildew-resistant products, masking, final cleanup |
1–3 weeks |
$7,000 – $15,000 |
| Exterior — trim and accent colours only |
Prep and prime bare spots, caulk where needed, paint trim/accent areas, protect adjoining surfaces, cleanup |
4–8 days |
$1,200 – $4,800 |
| Kitchen cabinet painting (doors, frames, spray finish) |
Hardware removal (reuse), degreasing, sanding/scuffing, primer, spray-applied finish system, reassembly, basic touch-ups |
1–3 weeks (incl. cure time) |
$2,500 – $6,800 |
| Specialty / faux finish (accent wall, texture) |
Surface stabilization and base coat, artistic finish application, protective topcoat where appropriate, detailed prep for clean edges |
2–7 days |
$700 – $6,500 |
Prices are estimates only and vary by project scope, site access and material selection.
What affects the price of painting in Richmond
Two Richmond homeowners can receive quotes for the “same” paint job that differ by 30–50% because the Lower Mainland–Southwest market has real cost drivers—especially when a home has older surfaces and coastal weather requires extra risk management. Across British Columbia, labour availability, minimum crew scheduling, and material standards (primer quality, mildew resistance, and adhesion performance) can change the final number even when the visible walls/trim look similar.
Exterior painting is tightly climate-bound in coastal BC. While the Lower Mainland doesn’t face Ontario- or Alberta-style deep freezes, long humid shoulder seasons still slow drying and increase mildew risk. That means contractors must schedule around dry windows, use high-adhesion, mildew-resistant products, and sometimes re-mobilize between weather breaks—costs that get priced into exterior ranges like $1,200–$15,000. By contrast, interior work runs more consistently through fall and winter, so crews can maintain productivity and keep interior pricing in the $300–$8,000 band with fewer schedule interruptions.
Older homes throughout the region also raise costs because surface prep can be 50–70% of labour on repaints: scraping failing coating, caulking cracks, spot-priming tannin/stains, and patching drywall. In Richmond, with 25.9% of dwellings built before 1981, it’s common to see “prep-heavy” work that pushes exterior jobs toward the higher end of the range even when the paint colours are simple. For example, a basic trim refresh might start around the low thousands, but when we find widespread peeling and moisture-related failures behind caulking, the job can quickly move toward the upper range. Conversely, a well-kept interior repaint with minimal repairs can stay close to the lower portion of the interior band because the labour focus stays on two-coat application rather than major patching and primer build-up.
| Price Factor |
Why It Matters |
Cost Impact |
| Surface prep — scraping, sanding, patching drywall or wood |
Prep determines adhesion; poor prep causes early flaking, especially under moisture |
+$500 to +$3,000+ depending on failure extent |
| Number of coats — 2-coat system over primer vs. 1 coat over existing |
Coat systems affect coverage, hide, and washability; “thick paint” usually fails sooner |
+$200 to +$1,200 |
| Paint quality tier — contractor-grade vs. premium (Benjamin Moore, Sherwin) |
Higher-tier paints can reduce streaking, improve colour consistency, and hold up better |
+$150 to +$900 |
| Ceilings and trim — adds significant time vs. walls-only |
Trim work needs careful masking and more cut-in time; ceilings require extra protection |
+$300 to +$2,000 |
| Exterior season window — short season raises summer rates |
Rain/humidity extend cure time and create schedule pressure |
+$300 to +$2,500 |
| Lead-safe precautions — required for pre-1978 homes with lead paint |
Containment, HEPA cleanup, and disposal add time and cost even if paint colour is unchanged |
+$500 to +$3,000+ |
| Surface material — drywall vs. plaster vs. wood vs. stucco |
Each substrate needs different primers and adhesion strategy |
+$200 to +$1,800 |
| Height and access — multi-storey exterior requires scaffolding or lifts |
Access equipment and safety controls increase labour hours |
+$400 to +$2,500+ |
Permits & regulations in British Columbia
In British Columbia, painting typically does not require a permit for ordinary residential projects. However, for homes built before 1978, health guidelines recommend testing for lead paint before sanding or scraping, and using lead-safe work practices if lead is found. For professional contractors, that usually means wet methods to control dust, HEPA vacuuming, plastic containment where appropriate, and proper disposal of debris and filters. This isn’t automatically mandated for homeowners, but it’s standard practice for contractors when lead risk exists—especially because prep work (scraping, sanding, stripping) is where exposure risk concentrates.
What DOES sometimes require a permit is not painting itself, but related work on the property: for example, structural or electrical modifications triggered by repairs made during a renovation, or certain building/renovation changes that require inspections. Pure “paint and primer” work on intact surfaces generally does not trigger permitting.
For a Richmond homeowner, the best verification is practical and document-based. Step one: ask for the contractor’s licence information and confirm it matches the work they advertise (residential contracting credentials where applicable) and that it’s current. Step two: request a certificate of liability insurance and check that it’s active and lists your property address as applicable (or at minimum includes residential work coverage). Step three: confirm workers’ compensation coverage (WSBC/WCB) for insured employees—ask for proof of coverage. Step four: get a written contract that clearly lists paint brand, sheen, number of coats, and exactly what prep is included (scraping level, caulking scope, priming requirements). A clear written scope prevents “surprise changes” later.
Interior vs exterior painting — getting the best result in Richmond
The biggest difference between a long-lasting paint job and a premature failure in Richmond is usually prep quality and system choice, not “premium paint” alone. For interiors, surface prep—filling, sanding smooth, removing grease, and priming problem areas—is more important than the brand of topcoat. Sheen matters too: kitchens and trim typically need satin or semi-gloss for durability and wipe-ability, while living rooms often look best in eggshell or matte for glare control. And even when the wall looks fine, two coats over a proper primer generally outlast one “thick” coat because coverage, sheen uniformity, and adhesion improve across the full film build.
For exteriors, British Columbia’s coastal moisture makes prep non-negotiable. Caulking should be handled before final painting to prevent water ingress at joints and to avoid peeling around trim lines. Primer type matters by substrate—oil-based options may be used on specific adhesion or stain-control needs, while latex systems are used when compatible and properly prepared. In our Lower Mainland–Southwest climate, mildew-resistant, high-adhesion products are essential because humidity and rain delays can create conditions for early biological staining if the wrong system is used.
Kitchens and trim can be a budget-smart alternative: cabinet painting usually costs far less than replacement, and if the prep is done right, you can get a factory-like finish using spray-applied coatings. For older pre-1978 homes, lead-safe precautions may add cost, but it protects your family and keeps the job compliant with standard professional practices. As a concrete example, choosing thorough exterior scraping and spot-priming might move you from the low end toward a mid-range exterior repaint, but it often prevents recurring blistering and flaking—far cheaper than repainting again in a few years.
| Project Type |
Key Prep Step |
Recommended Coats |
Price Band |
| Interior — fresh drywall (new construction) |
Prime bare drywall and fill/spot-sand seams for a uniform surface |
1 primer + 2 topcoats |
$1,200 – $4,000 |
| Interior — repaint (good condition, no repairs) |
Clean, lightly sand sheen differences, caulk small gaps, spot-prime if needed |
1 primer (spot) + 2 topcoats |
$300 – $2,200 |
| Interior — repaint (patching and priming needed) |
Patch, sand flush, and prime repaired areas and stained zones thoroughly |
1 full primer (or required areas) + 2 topcoats |
$800 – $3,800 |
| Exterior siding (wood or fibre cement) |
Scrape failing coating, sand edges smooth, caulk joints, prime bare substrate |
2-coat system over primer (priming varies by condition) |
$4,500 – $15,000 |
| Exterior trim and accents only |
Prep edges clean and prime the areas exposed by scraping |
1 primer (where needed) + 2 topcoats |
$1,200 – $4,800 |
| Kitchen cabinets (spray finish) |
Degrease, sand/prime properly, and mask areas for a smooth, sealed finish |
Primer + 2 finish coats (spray system) |
$2,500 – $6,800 |
How to choose a painting contractor in Richmond
Choosing the right painting contractor in Richmond is mostly about verifying coverage and getting an itemised scope you can trust. Start with licensing/credentials: ask which British Columbia contracting credentials apply to their work and confirm they’re current and appropriate. Next, request liability insurance documentation—typically a certificate of insurance—and verify it’s active, covers residential painting work, and includes adequate limits. Then confirm workers’ compensation coverage (WSBC/WCB) by asking for proof that their employees are covered; this matters because painting is labour-intensive and involves ladders, lifts, and material handling.
For quotes, get 2–3 itemised written estimates. You want line items that separate labour and materials: prep (scraping/sanding/patching), caulking, primer, paint coats, masking/protection, disposal, and any specialty handling like stain blocking or lead-safe procedures if applicable. A “lump sum” can hide major omissions.
Read the exclusions carefully. Ask: is permit pull included (if any related work requires it), is waste disposal included, and are you paying for repairs discovered mid-job or included in the original scope? Ask about warranty: workmanship warranty length, product/manufacturer warranty details, and whether the warranty is transferable if you sell your home. Finally, confirm payment terms: never pay more than 10–15% upfront, and use a holdback until the job is complete and touch-ups are done. Insist on a written timeline with a start date and a realistic completion estimate based on Richmond’s weather windows.
- Ask for proof of active liability insurance and confirm the address/job type is covered.
- Confirm WSBC/WCB coverage for workers (not just subcontractor names).
- Get 2–3 itemised quotes (labour vs materials; coats and primer listed).
- Make sure prep scope is explicit: scraping level, sanding, patching, and caulking.
- Confirm whether disposal of paint chips and debris is included.
- Check if lead-safe precautions are described for pre-1978 homes (if relevant).
- Verify the paint system: primer type, sheen, and number of coats.
- Ask who handles damaged drywall/trim if discovered during prep.
- Get a written start date, weather-adjusted plan, and completion target.
- Confirm surface protection details (floors, counters, fixtures) and cleanup method.
- Ask about workmanship warranty length and what it covers.
- Use a payment schedule with a small deposit and a final holdback until sign-off.
In Richmond, common red flags include: vague scope language (“prep as needed” without specifics), no written warranty terms, quotes that ignore primer/caulking details, asking for large upfront payments (beyond 10–15%), or avoiding proof of insurance/WSBC/WCB coverage.
Frequently asked questions — painting in Richmond
What is the best primer for older Richmond homes?
For older Richmond homes—especially those built before 1981—“best” depends on what’s failing and why. If you’re dealing with stains, tannins (common on some wood exposures), or uneven coating absorption, a stain-blocking primer is usually the right starting point because it prevents bleed-through. If coatings are chalky or peeling, prep comes first: scrape/sand to a sound edge and then prime bare substrate so the topcoat can bond. In pre-1978 homes where lead risk is possible, professionals often factor lead-safe procedures into prep (wet methods, HEPA cleanup) before priming. In pricing terms, primer-heavy jobs often shift upward in the exterior band (for example, $7,000–$15,000 on full-house work) because prep and safe handling add labour.
Should I paint or wallpaper my Richmond home?
In most Richmond interiors, paint is the simpler choice for long-term maintenance. With paint, you can spot-prime repairs, control sheen room-by-room, and achieve clean lines around trim without seam edges collecting moisture or dirt. Wallpaper can look great, but it requires a very smooth substrate—meaning more prep before installation and more careful removal later. In humid coastal conditions, any adhesion issues from imperfect base surfaces can show up sooner. If your walls have cracks or older patchwork, a repaint with proper patching and primer is usually the more reliable route. If your budget is tight, painting can stay in the interior ranges (such as $300–$2,200 for a repaint in good condition), while wallpapering often adds labour and material complexity.
How do I fix peeling exterior paint in Richmond?
Peeling exterior paint in Richmond is usually a symptom, not the only problem—moisture intrusion, failed adhesion, or inadequate surface prep are common causes. The fix starts with stopping the failure: scrape back to sound edges, sand feathered margins smooth, and remove any chalky material. Then caulk properly at joints before painting, because gaps allow water to get behind the coating again. After prep, prime bare wood/fibre cement and stain-block where needed; in coastal BC we also prioritize mildew-resistant, high-adhesion products suited to humidity and longer drying times. Expect prep-heavy work to move costs higher than a straightforward refresh; a trim-only project may remain closer to the lower end of exterior trim ranges, while full-house repainting can reach the $7,000–$15,000 band depending on how extensive peeling is.
What colours add the most resale value in Richmond?
Resale value in Richmond is less about a single “magic” colour and more about broad appeal and clean design choices. Homebuyers commonly respond well to neutral wall palettes—warm whites, soft greiges, and light beiges—because they photograph well and let furniture styles look current. For trim and ceilings, a consistent white or near-white (with the right sheen) tends to feel fresh without looking stark. If you add colour, use it intentionally: an accent wall or tasteful exterior trim tone can raise curb appeal without overwhelming the buyer. Because Richmond housing stock includes many mid-century to late 20th-century homes (Statistics Canada, 2021 Census), neutral modernization often helps. If you’re comparing budgets, staying with simpler neutral palettes usually avoids expensive extra colour-correction work during prep and application.
How much does it cost to paint a house in Richmond?
For Richmond homeowners, exterior and interior projects price out differently due to weather scheduling and prep requirements. A full exterior repaint (siding, trim, soffits) commonly lands in the range of about $7,000–$15,000, largely because scraping, caulking, primer, and mildew-resistant systems are time-consuming in coastal humidity. Interior painting varies widely by scope: a whole home can often fall somewhere in the $3,200–$7,800 band, depending on whether ceilings and trim are included and how much patching or priming is needed. If your home is older, more surface prep may be required (for example, Richmond has 25.9% of dwellings built before 1981), which can push costs toward the higher end. Cabinet painting is typically a separate budget category, often $2,500–$6,800 for many kitchen sizes, especially with a spray finish.
How much does interior painting cost per room in Richmond?
Per-room interior painting in Richmond usually depends on room size, ceiling height, how much patching is needed, and whether trim is included. For a standard bedroom or living room in good condition, homeowners commonly see ranges around $600–$1,600 per room. If walls need more repair work—patching drywall, spot-priming repairs, or addressing staining—the cost can rise toward the upper end. Sheen selection (for example, eggshell vs satin) can also affect material choice, but the biggest driver is prep. A two-coat system over appropriate primer is typically what delivers a clean, long-lasting result; cutting corners by skipping primer or under-coating can lead to faster failure and higher repaint costs later. If you share your room sizes and whether ceilings and trim are included, you can get a tighter estimate.